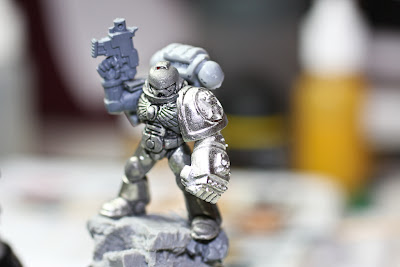
Sunday, September 19, 2010
Product Review: Forgeworld Imperial Fist Decals
The Imperial Fist decals I ordered from Forgeworld finally showed up on my doorstep the other day.
All in all, it is a pretty good sheet. There were a few printing glitches here and there, but it is a welcome addition for the squad markings because my freehand leaves much to be desired.
Starting off with the decals and the must have Micro Sol/Micro Set duo:
After applying Micro Set to the shoulder pad, the decal is dipped into the Micro Set bottle. It only takes about 30 seconds for the decal to become separated from the backing and is pushed onto the model with a brush.
And the tactical arrow:
After blotting dry with a tissue, Micro Sol is then brushed on the decals and left to sit overnight.
You can see here the difference between the Forgeworld decal and the standard decal that comes in Space Marine boxes.
I'm happy to have sheet and I recommend it to any Imperial Fist painter.
Labels:
Imperial Fists,
Product Review,
Space Marines
Tuesday, August 24, 2010
Addicted to OOP
I love scouring ebay for out of production marines.
I try not to pay more than five or six dollars for them, but I think they add a little character to the army.
This Veteran Sergeant is finished off with shoulder pad and power fist from the bits packs GW released a few months ago.
Inspiration for this guy blatantly stolen from the great Ron at From the Warp.
Hoping to get some color on these guys this weekend.
Labels:
Imperial Fists,
Space Marines
Sunday, August 22, 2010
Painting Imperial Fists, Part 2: Mid-coat and Some Detail
A two-part feature has evolved into a three-part so I hope you will bear with me. Check out part 1 here.
As we continue, we have applied the mid-coat on top of a base of Iyanden Darksun with a Gryphonne Sepia.
The mid-coat consists of a 1-1 ratio of Iyanden Darksun and Golden Yellow. Be sure to leave a little of the base-coat showing in the armor recesses and places that need to be heavily shaded.
The chest eagle is lightly highlighted with P3 Khador Red Base and washed with Baal Red.
I like to premix the mid coat batch so I can get consistent results over multiple figures. Empty dropper bottles are great for mixing up custom mixes or washes.
Next, the helmet lenses were tackled by first blocking them out with Skull White and base of Dark Angels Green. Hit the front corners with a spot of Snot Green.
Finish off the lens with a small spot of Skull White in the back corners. As this zoomed shot can show you, my sloppy painting aside, a little cheat I used to clean up the area around the eye.
A Sakura Pigma Micron Pen, Brown size 005, was used to shade the spot under the lens to clean up any stray white or green paint. It was also used on the shoulder pauldron to give a quick shade on the rim between the black and yellow. The brown ink is quite close to the color of Gryphonne Sepia wash but a little more opaque. If I was a little neater it would look spectacular but from afar the result is adequate.
The backpack is completed in the same fashion as the armor and the bolter is dry fit in place. the bolter is based in Chainmail and hit with a Badab wash. Edge the bolter casing with Adeptus Battlegrey and another wash of Badab.
Next up, I will attempt to highlight the armor without totally ruining the model.
Labels:
Imperial Fists,
Painting,
Space Marines
Tuesday, August 17, 2010
Painting Imperial Fists, Part 1: Base-coat and Wash
After a very long hiatus, I have returned to the 40K blog world. I hope not too many of you forgot about me.
Over the next two posts I am going to walk through how I do Imperial Fists. Hopefully it will give a few people some inspiration to tackle painting the dreaded yellow or to share how they do their fists.
im not the neatest painter nor the most talented but here goes:
Start with an even Iyanden Darksun from the Citadel Foundation range base-coat. It may look a little rough in places but that will be smoothed out in the next step.
Apply a liberal coat of Gryphonne Sepia from the Citadel Wash range and let dry. I like to tilt the model backwards to let the wash seep in to the crevices, dry, and then hit the back of the model and tilt dry again. Next, hit it with another liberal coat of wash.
A word on washes. I have gotten into the habit of adding a drop of Formula P3 mixing medium or Vallejo Model Color matt medium to the wash before applying. It keeps the pigment intact and improves the flow of the wash so it hits those seams in the armor without pooling on the flat parts too much. I used the P3 in this case.
Now, hit the chest eagle with P3 Khador Red Base. This gives a nice bright red without too much trouble.
Next, I apply two coats of Citadel Badab Black wash to the eagle. This tones the red way down and adds nice shadow to the wings and skull on the chest. I've also applied Citadel Chainmail to the armor joints, tubes and arm badge which was also then washed with Badab Black. I may have to apply another coat of wash as they are still a little to bright. I'm sure I could have goten a bit grimier with Boltgun Metal, but I tend to like the results of Chainmail with a wash.
The base was drybrushed first with Foundation Adeptus Battlegrey and then again with Astronomican Grey.
Well, thats all for the base of the miniature. Stay tuned for part two as we wrap it all up.
Labels:
Imperial Fists,
Painting,
Space Marines
Saturday, February 13, 2010
Best Wife Ever
After quickly reading through the first two books in the Horus Heresy Series, my wife surprised me this Valentines day with the the entire rest of the series sans the eighth book.
I was pleasantly surprised to open the big box and find some very good Sci-Fi reading waiting for me.
Thursday, February 11, 2010
Rogue Trader Friday (Modeling): JetBikes
As a companion to my Rogue Trader posts at From the Warp, we take a look at the Imperial JetBike.
Nothing says bad-ass 40k mayhem like a marine on a jetbike. Unfortunately with the limited sculpts back then, you really could only stick a marine from the RT box set on there as the rider.
Since I had played Imperial Guard, I got the bright idea to take one of the Imperial Roughrider command squads and plant them on a jet bike; Las pistol and chainsword blazing.
Good times.
Labels:
Rogue Trader
Thursday, February 4, 2010
Rogue Trader Friday (Modeling): Epic Imperial Guard
As a companion to my Rogue Trader posts at From the Warp, we take a look at the Imperial Guard on an Epic scale.
I would love to be able to field an Imperial Guard army with small detachments of Space Marines in a non-Apocalypse or Demon Hunter game.
I would have to imagine this is more "true to life" on how both arms of the Imperial forces would operate.
I also wouldn't mind if Epic was updated and new models released for it.
Labels:
Rogue Trader
Friday, January 29, 2010
Rogue Trader Friday (Modeling): Space Marines vs. Orks
Another great Space Marine diorama from times of old.
I always got a kick out of the Ork graffiti and the stormtroopers getting lit up as they enter the basement.
Of course, this is a companion to my Rogue Trader Friday posts at From the Warp.
Labels:
Rogue Trader,
Space Marines
Thursday, January 21, 2010
Rogue Trader Friday: Space Marines
As a companion to my Friday posts at From The Warp we have some of the great original plastic Rogue Trader Space Marines.
I always loved the way the Blood Angel Sergeant was depicted with the mottled brown paint scheme setting him apart from the rest of the squad.
Those Crimson Fists are not too shabby looking either.
Labels:
Rogue Trader,
Space Marines
Thursday, January 14, 2010
Rogue Trader Friday (Modeling): Ork Dreadnoughts
And rounding out the recent Rogue Trader posts over at From the Warp, we have the Space Ork Dreadnought.
Amusing in their construction, as well as their depiction in the artwork, the Ork Dreadnought strikes a no-nonsense pose on the battlefield.
Labels:
Rogue Trader
Saturday, January 9, 2010
Blood Angels!
Games-Workshop has just announced Blood Angels to be re-released this april.
This April the Blood Angels will be re-launched with an all-new Codex and range of plastic and metal miniatures. One of the oldest and noblest of all Space Marine Chapters, the Blood Angels have stood fast against the enemies of the Imperium since the Great Crusade and it was their Primarch Sanguinius, who laid down his life to aid the Emperor against Horus in the final hours of the Warmaster’s rebellion. The new Codex explores the background and history of these superhuman warriors like never before, and contains new artwork depicting some of their greatest battles and most powerful champions.
The Blood Angels have always been a powerful close combat army and have been made even deadlier thanks to a range of specialist wargear, the ability to field Assault Squads as Troops choices, and more Dreadnoughts than any other Space Marine Chapter, including a Death Company Dreadnought and the fabled Furioso Dreadnought. The Sons of Sanguinius will be deep striking onto a tabletop near you this April – now’s the time to practice painting red.
Having just begun work on my Space Hulk set, I am interested in seeing what comes down the pike minatures wise.
Labels:
Space Marines
Thursday, January 7, 2010
Rogue Trader Friday (Modeling): Eldar Dreadnoughts
Continuing on the theme of Rogue Trader Era Dreads, this week we have some examples from the Eldar (Space Elf) side of things.
As I commented on my From the Warp post, these things have an almost comical gracefulness to them. Not very fear inducing.
But then again, neither are the Eldar.
Labels:
Rogue Trader
Friday, January 1, 2010
Rogue Trader Friday (Modeling): Imperial Dreadnoughts
Along with my post this week at From the Warp, I thought I'd take a look at some Imperial Dreadnoughts from a bygone era. Im not sure they hold a candle to the "walking washing machines" the Space Marines currently deploy, but they certainly were unique.
The diagram below shows some interesting color schemes for the dreads including a Mentor Legion Dread apparently attached to the Inquisition.
Labels:
Rogue Trader
Subscribe to:
Posts (Atom)